
Convert a Drawing to SVG
Prepare a scan, phone photograph or digital drawing, then inspect the trace for lost lines and unwanted filled regions. Export authorization does not establish fidelity.
Identify the drawing source
Scans may include paper texture, photographs may include lighting and perspective variation, and digital drawings may contain antialiasing or layered effects. Identify the category before deciding how to prepare and inspect the trace. Preserve the unedited capture so that cleanup can be reversed.
Capture and prepare without erasing the drawing
- Lighting: use even illumination for a photographed drawing and avoid strong shadows or glare. Keep the camera square to the paper; retake a skewed capture when possible.
- Background: remove unrelated clutter and separate the drawing from the surrounding surface. Do not erase white highlights that belong to the drawing.
- Contrast: make intentional lines and fill boundaries distinguishable without erasing subtle details. Compare a levels adjustment with the original before considering a hard black-and-white threshold.
- Crop: include the complete drawing while excluding material that should not become geometry. Check that faint line ends are not clipped.
For a sketch from Procreate, Fresco or another drawing app, retain the layered original and use a raster export documented for that app/version. Do not assume a built-in SVG export. A flattened PNG cannot retain the app’s layers, even when it has transparency.
Compare line continuity and filled strokes
Upload an accepted PNG, JPEG or WebP to create a protected raster preview. Compare gaps, stray fragments, curve continuity and fill-region boundaries against the drawing. Check whether paper texture became unwanted shapes and whether small marks remain meaningful. Editable SVG requires successful authorization and still needs inspection.
A thick drawn line can trace as a filled ribbon with two boundaries. That differs from one open centerline suitable for some pen workflows. Inkscape’s 1.3 guide documents a separate centerline tracing mode; it is not a selectable Vectorize control: https://inkscape-manuals.readthedocs.io/en/latest/tracing-an-image.html
Illustrative diagnostic: if a drawn loop has a faint break, thresholding may widen the break or close it. Inspect that location in the original, prepared image and resulting trace. If your intended task needs a continuous line, resolve the actual gap deliberately; filling the visible area does not prove the path is closed.
After the trace
The SVG contains geometry for you to review, not pre-reviewed machine instructions. Compare it with the source at intended size, then inspect individual nodes and handles if a curve needs repair. Import into the selected cutting application only as a separate preparation step; import alone does not validate scale, operation, material behavior or cut paths.
Tattoo reference: Choose authorized reference artwork
Compare authorized artwork at the artist’s planned dimensions, preserve intended lines and gaps, and hand off a reference for separate stencil preparation.
If the artist requests a raster reference and the existing image is adequate, supply that reference directly. Use the SVG-specific steps below only when geometry edits are useful to the artist; tracing and SVG export are optional, not prerequisites for the reference handoff.
Choose the clearest authorized reference available. Deliberate line work, useful contrast, separated shapes, and intentional negative space are easier to review than blur, compression artifacts, cluttered backgrounds, or highly detailed photographs.
Tattoo reference: Compare the protected preview
Upload an accepted PNG, JPEG, or WebP to create a protected preview. Compare the preview with the source, and obtain editable SVG only through paid or complimentary authorization; the protected preview is not an editable export or a finished stencil.
Tattoo reference: Inspect at the artist’s planned size
Inspect the SVG at the tattoo artist's planned artwork dimensions. Check line continuity, unintended gaps or joins, small details, curve shape, and negative space, and revise the source or geometry when those features do not support the intended reference.
Tattoo reference: Keep stencil preparation with the artist
Give the reviewed SVG to the tattoo artist or open it in separate stencil-preparation software. The professional downstream workflow determines artwork adaptation, stencil preparation, placement, and application; Vectorize Image does not make those decisions.
Tattoo reference: Respect the limits of reference geometry
SVG geometry does not guarantee stencil readiness, line behavior on skin, safety, or a successful tattoo result. This page provides no medical advice and does not replace the tattoo artist's review of the artwork, client, placement, equipment, or procedure.
Tattoo reference: Worked reference comparison at two sizes
Illustrative drawing: an outlined crescent contains two short interior lines and a small open gap. Reducing its width from 80 mm to 40 mm also halves the gap and the distance between the lines. Print or view a scale-checked reference at both proposed sizes and ask the artist which details should be adapted. This is a geometry comparison, not advice about what will heal or remain visible on skin.
Compare both references with the approved drawing. A filled silhouette trace may erase line weight or close an intentional opening; smooth curves can still misrepresent the original. Keep an unaltered reference and label the candidate adaptation so the artist can choose which interpretation to use.
Tattoo reference: Make the handoff specific to the artist
- Ask for the reference format, intended dimensions and orientation. Include a dimension annotation or ruler reference so automatic fit-to-page printing is detectable.
- Identify the source owner or permission and which drawing revision is approved. Mark proposed changes as proposals, not approved stencil details.
- Ask the artist to decide line adaptation and stencil preparation in their selected workflow. Vectorize supplies authorized SVG after inspection; it does not validate stencil software, equipment or application.
Digital stroke test and capture boundary
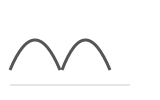
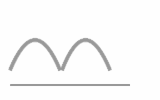
The source uses3-pixel gray curve strokes and a1-pixel pale baseline. Actual local tracing changes their tonal relationship. Reject that alteration if the drawing’s appearance matters. This controlled digital example cannot establish capture quality: the required scan and phone photograph of the same physical drawing remain unverified, and no captured experience is claimed.
Primary sources
Free Protected Preview
Protected vector preview
Use the protected preview only if your source is PNG, JPEG or WebP and reconstructed paths are useful. Keep an existing vector or CAD master; inspect the chosen receiving workflow separately.
No account is required to create or view the protected preview. The preview accepts one PNG, JPEG, or WebP file up to 4 MiB; other source formats must be exported or converted to one of those formats first. Editable SVG export requires paid or complimentary access. Review the exported SVG in the appropriate downstream software; non-SVG formats and machine instructions require separate conversion.
Inspect a raster-only source